How To Make A Dining Table Pedestal Base
A dining table pedestal base offers a unique aesthetic and functional advantage over traditional four-legged designs. It provides more legroom around the table, as individuals are not constrained by corner legs. Constructing a pedestal base allows for customization in design, material, and finish, ensuring the table complements the desired interior style. This article details a comprehensive approach to building a robust and visually appealing dining table pedestal base.
Planning and Design Considerations
The initial phase of creating a dining table pedestal base involves careful planning and design. The dimensions of the tabletop are crucial in determining the appropriate size and stability of the base. A larger tabletop necessitates a wider and more substantial base to prevent tipping or instability. The chosen material – typically wood, though metal is also an option – will influence the design and construction techniques. Selecting a hardwood species such as oak, maple, or walnut offers durability and aesthetic appeal. Softwoods like pine are less expensive but may require extra care during construction and finishing to prevent dents and scratches.
The design of the pedestal itself can vary greatly. It can be a simple, single column, a more complex series of interconnected shapes, or a turned spindle. The design should consider the overall style of the dining room and the desired level of visual interest. A blueprint or detailed sketch is essential to visualize the final product and ensure accurate cuts and joinery. This blueprint should include precise measurements for all components, including the base, column, and any supporting elements.
Beyond aesthetics, structural integrity is paramount. The weight of the tabletop must be adequately supported by the base. A wider base and a robust connection between the column and the base are critical for stability. Consider incorporating internal bracing or reinforcements within the pedestal column to enhance its load-bearing capacity. Simulation software or consulting with a structural engineer can be beneficial for larger or more complex designs to ensure adequate safety and stability.
The method of attaching the tabletop to the pedestal base also requires careful consideration. Options include using screws, brackets, or a combination thereof. The attachment method should provide a secure and rigid connection to prevent wobbling or detachment. Recessed mounting plates can be incorporated into the top of the pedestal to provide a stable platform for attaching the tabletop. Predrilling pilot holes is crucial to prevent splitting the wood during screw insertion.
Material Selection and Preparation
The choice of materials significantly impacts the final product's appearance, durability, and cost. As mentioned previously, hardwoods offer superior strength and aesthetic appeal. When selecting wood, scrutinize each board for knots, warps, and other imperfections. Ensure the wood is properly seasoned and dried to minimize the risk of warping or cracking after construction. Moisture meters can be used to verify the wood's moisture content is within an acceptable range.
Prepare the selected wood by milling it to the required dimensions. This involves using a jointer to create a flat surface on one face and one edge, followed by a planer to flatten the opposite face parallel to the first. A table saw is then used to rip the wood to the desired width. Accurate and consistent milling ensures tight-fitting joints and a professional-looking finish. Safety precautions, including wearing eye protection and using push sticks, are essential when operating power tools.
Beyond wood, consider the need for fasteners, adhesives, and finishing materials. High-quality wood glue is essential for creating strong and durable joints. Select screws that are appropriate for the wood type and joint configuration. Sandpaper of varying grits is needed for smoothing the wood surfaces before finishing. The choice of finish – stain, varnish, paint, or oil – depends on the desired aesthetic and the level of protection required. Consider using a sealant or primer before applying the finish to improve adhesion and prevent discoloration.
Metal components, such as brackets or mounting plates, may be incorporated into the design for added strength or visual appeal. Ensure the metal is compatible with the wood and that appropriate fasteners are used to secure them together. Consider using stainless steel or other corrosion-resistant metals to prevent rust or deterioration over time.
Construction Techniques and Assembly
The construction of the pedestal base typically involves creating the base itself, the central column, and any intermediate supports or decorative elements. Start by assembling the base, ensuring it is perfectly square and level. Common joinery techniques for the base include mortise and tenon joints, dovetail joints, or biscuit joints. Mortise and tenon joints offer exceptional strength and are often preferred for larger or heavier tables. Dovetail joints provide a visually appealing and mechanically strong connection. Biscuit joints are easier to execute but may require additional reinforcement for heavy loads.
Once the base is assembled, construct the central column. The design of the column can vary greatly depending on the desired aesthetic. A simple box column can be constructed from four pieces of wood joined together with mitered edges. A more complex turned spindle requires the use of a lathe. Internal bracing or reinforcements can be added to the column to enhance its strength and stability. The column should be securely attached to the base using screws, glue, or a combination thereof. Consider using a dowel or tenon to further strengthen the connection between the column and the base.
If the design includes intermediate supports or decorative elements, these should be constructed and attached to the base and column before proceeding to the final finishing stages. Ensure these elements are properly aligned and securely fastened to prevent movement or loosening over time. Use clamps to hold the pieces together while the glue dries. Wipe away any excess glue with a damp cloth to prevent it from interfering with the finishing process.
After the pedestal base is fully assembled, thoroughly sand all surfaces to create a smooth and uniform finish. Start with a coarser grit sandpaper to remove any imperfections or blemishes, and then gradually move to finer grits to achieve a polished surface. Pay particular attention to edges and corners to ensure they are smooth and rounded. Remove all sanding dust with a vacuum cleaner or tack cloth before applying the finish.
Apply the chosen finish according to the manufacturer's instructions. Multiple coats may be required to achieve the desired level of protection and aesthetic appeal. Allow each coat to dry thoroughly before applying the next. Lightly sand between coats to remove any imperfections and improve adhesion. A final coat of clear varnish or polyurethane can be applied to provide added protection and durability.
Finally, attach the tabletop to the pedestal base using the chosen method. Ensure the tabletop is properly aligned and centered on the base before securing it in place. Use screws, brackets, or a combination thereof to create a secure and rigid connection. Predrill pilot holes to prevent splitting the wood during screw insertion. Tighten the screws gradually and evenly to avoid warping or stressing the tabletop. Inspect the finished table for stability and adjust as needed. A well-constructed pedestal base should provide a stable and aesthetically pleasing foundation for the dining table.

Diy Round Table Kitchen Wood Pedestal Base

Build A Simple Diy Pedestal Table Base Easy Steps With Abbotts At Home

Pedestal Table Base Build Round Part 1

Diy Round Table Wood Designs Dining Furniture Plans

Diy X Base Circular Dining Table Jaime Costiglio

Round Scalloped Fluted Pedestal Dining Table Diy Seats 10 12 People Black Ink Oak Finish

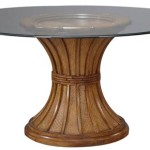
Diy Wood Pedestal Table Base The Inspired Work

Build A Simple Diy Pedestal Table Base Easy Steps With Abbotts At Home

How To Make An Upcycled Pedestal Dining Table Collective Gen

Diy Wood Pedestal Table Base The Inspired Work
Related Posts