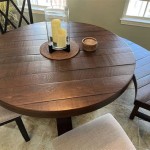
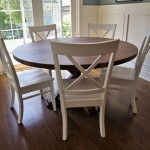
How To Build A Round Bar Table Out Of Wood and Glass Pieces
Constructing a custom bar table offers an opportunity to personalize a living or entertainment space. This article details the process of building a round bar table using wood and glass components, providing a comprehensive guide for individuals with intermediate woodworking skills.
The design incorporates a sturdy wooden base, providing stability and aesthetic appeal, and a circular glass tabletop, adding a touch of elegance and functionality. This project requires careful planning, precise measurements, and adherence to safety protocols. The following sections outline the necessary materials, tools, and step-by-step instructions for successful completion.
Key Point 1: Planning and Material Selection
Effective planning is crucial before commencing the construction process. It involves determining the desired dimensions of the bar table, selecting appropriate materials, and creating a detailed construction plan. The dimensions should be appropriate to the intended space and consider the number of users the table will accommodate. The glass tabletop's diameter will dictate the overall size and shape of the wooden base.
Material Selection:
Wood: Select high-quality hardwood for the base construction. Options include oak, maple, or walnut, depending on the desired aesthetic and budget. Consider the wood's grain pattern and color to ensure compatibility with the surrounding décor. The wood should be kiln-dried to minimize warping or cracking.
Glass: Opt for tempered glass for the tabletop. Tempered glass is significantly stronger than standard glass and shatters into small, relatively harmless fragments if broken, enhancing safety. The thickness of the glass should be appropriate for the table's size and intended use. A minimum thickness of ½ inch is generally recommended for larger tables. Choose clear or tinted glass based on personal preference.
Fasteners: Utilize high-quality wood screws, appropriate for the chosen wood type, to ensure a secure and durable assembly. Consider using pocket hole screws for concealed joinery, enhancing the table's aesthetic appeal. Select screws with a rust-resistant coating to prevent corrosion over time. Wood glue is essential for strengthening joints and creating a seamless bond between wooden components. Choose a waterproof wood glue for added durability, especially if the table will be exposed to moisture.
Finishes: Select a suitable wood finish to protect the wooden base and enhance its natural beauty. Options include varnish, polyurethane, or lacquer. Consider the desired sheen level (e.g., matte, satin, gloss) and the ease of application. Ensure the chosen finish is compatible with the selected wood type and wood glue. For the glass surface, consider using a glass cleaner or protector to maintain its clarity and prevent scratches.
Additional Materials: Sandpaper (various grits), wood filler, primer, paint (optional), measuring tape, pencil, safety glasses, dust mask, and work gloves are also required.
Detailed Construction Plan: Create a detailed construction plan, including precise measurements for all wooden components. This plan should include diagrams illustrating the assembly process and the placement of fasteners. This will minimize errors and ensure a structurally sound final product. Consider using woodworking software to create a professional-looking plan, further visualizing the project.
Key Point 2: Constructing the Wooden Base
The wooden base serves as the foundation for the bar table, providing stability and support for the glass tabletop. This process involves cutting the wood components to the specified dimensions, assembling the base using appropriate joinery techniques, and applying a protective finish.
Cutting the Wood Components: Using a miter saw or circular saw, cut the wooden components according to the dimensions outlined in the construction plan. Ensure accurate cuts to maintain the table's structural integrity. Employ clamps to secure the wood while cutting, preventing movement and ensuring clean, precise cuts. Label each component after cutting to avoid confusion during assembly.
Assembling the Base: Assemble the wooden base using a combination of wood screws, wood glue, and appropriate joinery techniques. Pocket hole joinery is recommended for concealed fasteners, creating a clean and seamless appearance. Ensure all joints are tight and secure. Apply wood glue liberally to all mating surfaces before fastening. Use clamps to hold the components together while the glue dries, ensuring a strong and durable bond. Check the base for squareness and levelness throughout the assembly process.
Sanding and Filling: After the glue has dried, sand the wooden base to create a smooth surface. Start with a coarse grit sandpaper (e.g., 80 grit) to remove any imperfections, then gradually move to finer grits (e.g., 120 grit, 220 grit) for a polished finish. Fill any gaps or imperfections with wood filler, allowing it to dry completely before sanding. Remove all sanding dust with a tack cloth before proceeding to the next step.
Finishing the Base: Apply a primer to the wooden base to create a uniform surface for the finish. Allow the primer to dry completely before sanding lightly with fine-grit sandpaper. Apply the chosen wood finish according to the manufacturer's instructions. Apply multiple coats for enhanced protection and durability, allowing each coat to dry completely before applying the next. Sand lightly between coats with fine-grit sandpaper for a smooth finish. Consider using a spray gun for a professional-looking finish, ensuring even coverage and minimizing brush strokes.
Types of Base Designs: There are many types of round bar table bases that can be built out of wood. A few options are:
- Pedestal Base: a solid center piece with a wide bottom to provide stability.
- Tripod Base: Utilizes three legs connected at a central point to distribute weight and create a modern look.
- Circular Base: A continuous ring or circular design for a solid and stable foundation.
Key Point 3: Installing the Glass Tabletop
The final step involves installing the glass tabletop onto the wooden base. This requires careful handling of the glass and the use of appropriate mounting hardware to ensure a secure and stable connection.
Preparing the Mounting Surface: Clean the top surface of the wooden base to remove any dust or debris. This will ensure a clean and secure contact between the base and the glass tabletop. Consider applying felt pads or rubber bumpers to the top surface of the base to protect the glass from scratches and provide a cushioning effect, preventing slippage.
Securing the Glass: There are several methods for securing the glass tabletop to the wooden base:
- Silicone Adhesive: Applying a bead of high-quality silicone adhesive around the perimeter of the wooden base will create a strong and durable bond. Ensure the silicone is specifically designed for glass and wood applications.
- Glass Tabletop Connectors: These connectors are designed to provide a secure and discreet method for attaching glass to wood. They typically consist of metal discs or clips that are attached to the wooden base and then secured to the glass using screws or adhesive.
- Recessed Mounting: Create a shallow recess in the wooden base to accommodate the glass tabletop. This will provide a flush and secure fit, preventing the glass from shifting or sliding.
Applying Silicone (if using): Apply a continuous bead of silicone adhesive to the top surface of the wooden base, focusing on the area where the glass tabletop will make contact. Carefully position the glass tabletop onto the base, ensuring it is centered and aligned correctly. Apply gentle pressure to the glass to ensure a secure bond. Allow the silicone to cure completely according to the manufacturer's instructions. Remove any excess silicone with a razor blade or solvent.
Using Glass Tabletop Connectors (if using): Position the connectors evenly around the perimeter of the wooden base. Attach the connectors to the base using screws or adhesive, ensuring they are securely fastened. Carefully position the glass tabletop onto the base, aligning it with the connectors. Secure the glass to the connectors using the provided hardware. Check the stability of the tabletop to ensure it is securely attached.
Final Inspection: After installing the glass tabletop, inspect the entire table for any imperfections or instability. Ensure all joints are secure, and the glass is properly aligned and attached. Clean the glass surface with a glass cleaner to remove any fingerprints or smudges.
By following these detailed instructions and paying careful attention to detail, individuals can successfully construct a round bar table using wood and glass components, creating a unique and functional piece of furniture for their home.

This Is The Heaviest Coolest Most Awesomest Steampunk Pub Style Table Ever It Disassembles Into Three Pieces For Transport But Thing Solid Will Make Any Space Proud 675 1 4 Glass Top

How To Make A Barrel Table Wood

Wine Barrel Furniture Ideas For Unique Vibes Cabinfield Blog

Pub Sets Can Make Your Home Stylish And Functional

13 Modern Outdoor Bar Ideas Trex

61 Home Bar Ideas Outstanding Elegant Designs

How To Build A Bar Make Your Home More Awesome
:max_bytes(150000):strip_icc()/charlestoncrafted-b52d47713ae44d57a8f06697b427b9fe.jpg?strip=all "18 Diy Outdoor Table Plans")
18 Diy Outdoor Table Plans

How To Make A Table Walnut And Resin Woodworking

How To Build A Post Mounted Patio Table Lowe S
Related Posts