```html
How To Build A Round Table Base
Constructing a durable and aesthetically pleasing base for a round table involves careful planning, precise execution, and a thorough understanding of woodworking principles. The choice of materials, joinery techniques, and finishing methods will all significantly impact the stability and visual appeal of the finished piece. This article provides a comprehensive guide to building a round table base, focusing on key considerations and practical steps.
The first step involves determining the desired size and style of the table. This includes the diameter of the tabletop, the overall height of the table, and the desired aesthetic – whether it's a simple, modern design or a more ornate, traditional style. These decisions will dictate the dimensions of the base and the complexity of the joinery required.
Material selection is crucial. Hardwoods such as maple, oak, and walnut are commonly used for table bases due to their strength and durability. Softwoods like pine are less expensive, but may not provide the necessary stability for a large or heavily used table. Plywood can be used for certain components, but its edges will need to be addressed to maintain a professional appearance. Consider the grain pattern and color of the wood, ensuring it complements the tabletop and the overall design aesthetic.
Planning and Design Considerations
The design phase is paramount and necessitates careful consideration of several factors. The footprint of the base, its height, and its structural integrity are all interconnected. A wider base generally provides greater stability, but it can also detract from the visual appeal, especially in smaller spaces. The height of the base determines the overall height of the table, which should be comfortable for seated users.
The type of joinery employed is another critical design element. Traditional joinery methods like mortise and tenon, dovetail, and bridle joints offer exceptional strength and durability, but they require specialized tools and skills. Simpler joinery methods, such as pocket screws and dowels, can be used for less demanding applications, but they may require additional reinforcement to ensure adequate stability. The choice of joinery should be balanced against the skill level of the builder and the desired level of craftsmanship.
The table's intended use also informs the design. A dining table, which will support significant weight and be subjected to frequent use, requires a more robust base than a decorative side table. Similarly, a table intended for outdoor use will require weather-resistant materials and finishes.
Construction Process: Step-by-Step Guide
Once the design is finalized and the materials are selected, the construction process can begin. This typically involves the following steps:
1. Preparing the Wood: This involves milling the lumber to the desired dimensions, ensuring that all surfaces are flat, square, and smooth. This can be achieved using a jointer, planer, and tablesaw. Accurate milling is essential for creating tight, strong joints.
2. Cutting the Components: Using the design plans as a guide, cut all the individual components of the base to their specified dimensions. This includes the legs, stretchers, and any other structural elements. Accuracy is crucial at this stage, as any errors will accumulate and affect the final outcome.
3. Creating the Joinery: This is where the chosen joinery techniques are implemented. For mortise and tenon joints, mortises are cut into one piece and tenons are shaped on the mating piece. For dovetail joints, interlocking tails and pins are cut into the wood. For pocket screws, angled holes are drilled into the wood to allow screws to be driven at an angle. For dowels, corresponding holes are drilled into both pieces and the dowels are inserted with glue.
4. Assembling the Base: With all the joinery completed, the base can be assembled. Apply glue to all mating surfaces and clamp the components together securely. Ensure that the base is square and level during assembly. Allow the glue to dry completely before removing the clamps.
5. Sanding and Finishing: Once the glue is dry, the base can be sanded smooth. Start with a coarse grit sandpaper and gradually work your way to a finer grit. This will remove any imperfections and prepare the surface for finishing. Apply the desired finish, such as stain, varnish, or paint, following the manufacturer's instructions. Multiple coats may be required to achieve the desired level of protection and appearance.
6. Attaching the Tabletop: The final step is to attach the tabletop to the base. This can be done using screws, bolts, or specialized table fasteners. Ensure that the tabletop is properly aligned and securely attached to the base. Pre-drilling pilot holes will prevent the wood from splitting.
Ensuring Stability and Durability
The long-term stability and durability of a round table base depend on several factors. The type of wood used, the quality of the joinery, and the design of the base all play a role. A well-designed base will distribute the weight of the tabletop evenly and resist racking and wobbling.
Reinforcing the joints is essential for increasing their strength. This can be done using glue blocks, metal brackets, or additional fasteners. Glue blocks are small pieces of wood that are glued into the corners of the joints to provide extra support. Metal brackets can be used to reinforce areas that are subjected to high stress. Additional fasteners, such as screws or bolts, can be used to further secure the joints.
The finish also plays a role in protecting the wood from moisture and wear. A durable finish will prevent the wood from absorbing moisture, which can cause it to warp or crack. It will also protect the surface from scratches and stains. Regular maintenance, such as cleaning and polishing, will help to extend the life of the finish and the table itself.
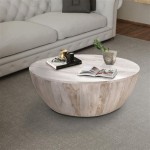
A strong central support element, particularly for larger round tables, is critical. This can take the form of a pedestal with a wide base, a series of interconnected legs that converge at a central point, or a combination of these elements. The design should ensure that the weight is distributed evenly across the base and that there is no tendency for the table to tip or wobble.
Consider adding leveling feet to the bottom of the base. These adjustable feet allow for fine-tuning of the table's level, even on uneven floors. They can also protect the floor from scratches and dents.
The key to a successful round table base is meticulous planning, careful execution, and a commitment to quality craftsmanship. By following these guidelines, it is possible to create a beautiful and functional table that will last for many years to come.
```
Round Scalloped Fluted Pedestal Dining Table Diy Seats 10 12 People Black Ink Oak Finish

Diy Round Table Kitchen Wood Pedestal Base

Diy X Base Circular Dining Table Jaime Costiglio

Diy How To Build A Round Outdoor Dining Table Building Strong

Diy Simplistic Circular Dining Table Kreg Tool

Diy Round Table Shanty 2 Chic

Diy X Base Circular Dining Table Jaime Costiglio

Build A Round Side Table Basic

Diy Wood Pedestal Table Base The Inspired Work

Build A Simple Diy Pedestal Table Base Easy Steps With Abbotts At Home
Related Posts