How To Build A Small Kitchen Table
Building a small kitchen table is a rewarding project that allows for customization of furniture to fit specific needs and spaces. This article provides comprehensive instructions for constructing a sturdy and aesthetically pleasing kitchen table suitable for smaller dining areas. The process involves careful planning, material selection, precise cutting, secure assembly, and a durable finish.
Planning and Design Considerations
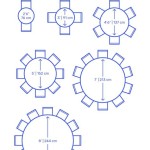
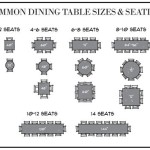
Before commencing the build, detailed planning is crucial. This stage involves determining the dimensions of the table based on the available space and intended use. A standard height for a kitchen table is approximately 30 inches (76 cm). The length and width will depend on the number of people the table should accommodate. For a small table intended for two people, a size of 30 inches (76 cm) by 30 inches (76 cm) may suffice. For a small table seating four, consider a size of 36 inches (91 cm) in width and 48 inches (122 cm) in length.
The design should also consider the style of the table. Options include a traditional four-legged table, a pedestal table, or a trestle table. The choice will influence the required materials and construction techniques. A four-legged table is generally the simplest to build and will be the focus of this guide. The leg design can range from straight, simple legs to tapered or turned legs, depending on the desired aesthetic. Simplicity is generally recommended for a first-time furniture-building project.
Creating a sketch or using a CAD (Computer-Aided Design) program to visualize the table before construction begins is highly recommended. This allows for the identification and correction of potential design flaws. Include precise measurements for all components, including the tabletop, legs, aprons, and any support structures.
Choosing the right lumber is also important. Hardwoods such as maple, oak, or cherry are durable and offer a beautiful finish. Softwoods like pine are less expensive and easier to work with but are more susceptible to dents and scratches. Consider the overall aesthetic and the desired level of durability when selecting the wood. Calculate the total amount of lumber required, adding extra material to account for mistakes and waste.
Materials and Tools Required
The following materials and tools are necessary for the construction of a small kitchen table:
Materials:
* Lumber for the tabletop (e.g., maple, oak, pine)
* Lumber for the legs (e.g., 4x4 or pre-made table legs)
* Lumber for the aprons (the frame supporting the tabletop)
* Wood glue
* Screws (appropriate length for connecting aprons to legs and tabletop)
* Sandpaper (various grits, e.g., 80, 120, 220)
* Wood stain or paint (optional)
* Wood sealant or varnish
* Wood filler (for filling any imperfections)
* Safety Glasses
* Hearing Protection
Tools:
* Measuring tape
* Pencil
* Circular saw or table saw
* Miter saw (optional, for precise angle cuts)
* Drill with various drill bits and screwdriver bits
* Clamps (various sizes)
* Router (optional, for shaping edges)
* Sander (orbital or belt sander)
* Wood plane (optional, for smoothing surfaces)
* Square
* Safety glasses
* Dust mask or respirator
Investing in quality tools will simplify the construction process and yield better results. It is crucial to prioritize safety and wear appropriate protective gear when operating power tools.
Cutting and Preparing the Components
Begin by cutting the lumber for the tabletop to the desired dimensions. Accurate cuts are essential for a square and stable table. If using multiple boards for the tabletop, join them together using wood glue and clamps. Ensure the edges are aligned perfectly before tightening the clamps. Allow the glue to dry completely, typically 24 hours, before removing the clamps.
Next, prepare the legs. If using pre-made table legs, ensure they are of the appropriate height and style. If making the legs from lumber, cut them to the appropriate length. For a simple, straight leg design, a 4x4 piece of lumber is often used. The legs can be tapered using a table saw or hand plane for a more refined look. All four legs should be identical in size and shape to ensure the table sits evenly.
Cut the aprons to the correct length. The aprons provide structural support to the tabletop and connect the legs. The length of the aprons will depend on the size of the tabletop and the position of the legs. The aprons are typically attached to the legs using screws and wood glue. Ensure the aprons are square and level with the tabletop.
Once all the components are cut, sand all surfaces to create a smooth finish. Start with a coarse grit sandpaper (e.g., 80 grit) to remove any imperfections and then progress to finer grits (e.g., 120 grit and 220 grit) for a smooth, even surface. Pay particular attention to the edges and corners, rounding them slightly to prevent splintering. Remove all dust with a tack cloth or vacuum cleaner before proceeding to the assembly stage.
Assembling the Table
With all the components prepared, the assembly process can begin. Begin by attaching the aprons to the legs. Apply wood glue to the contact surfaces and clamp the aprons to the legs, ensuring they are square and flush. Predrill pilot holes for the screws to prevent the wood from splitting. Use screws of the appropriate length to securely fasten the aprons to the legs. Allow the glue to dry completely before removing the clamps. The assembly now should be a complete base structure.
After the base frame is assembled, attach the tabletop to the apron structure. Place the tabletop face down on a clean, protected surface. Position the apron assembly onto the tabletop, ensuring it is centered. Predrill pilot holes from inside the apron structure, drilling upwards into the tabletop. Use screws of the appropriate length to securely fasten the tabletop to the apron structure. Do not overtighten the screws, as this can cause the wood to split.
Inspect all joints and connections to ensure they are secure and stable. Apply wood filler to any gaps or imperfections, allowing it to dry completely before sanding smooth. A card scraper is helpful here and will reduce the sanding needed. This step is critical for creating a professional-looking finish.
For additional stability, corner braces can be added to the inside corners of the apron structure. These braces provide extra support and prevent the table from wobbling. Attach the corner braces using screws and wood glue.
Finishing and Sealing
The final step is to apply a finish to protect the wood and enhance its natural beauty. The choice of finish will depend on personal preference and the desired level of durability. Options include wood stain, paint, varnish, lacquer, and oil-based finishes.
If using a wood stain, apply it evenly to all surfaces using a brush or cloth. Allow the stain to penetrate the wood for the recommended time, and then wipe off any excess stain with a clean cloth. Apply multiple coats of stain to achieve the desired color intensity, allowing each coat to dry completely before applying the next.
If painting the table, apply a primer coat to prepare the surface for the paint. Sand the primer coat lightly with fine-grit sandpaper to create a smooth surface. Apply multiple coats of paint, allowing each coat to dry completely before applying the next. A light sanding between coats will improve the adhesion of the paint.
After the stain or paint has dried completely, apply a sealant or varnish to protect the finish. A sealant or varnish will provide a durable, water-resistant surface that is easy to clean. Apply multiple coats of sealant or varnish, allowing each coat to dry completely before applying the next. Lightly sand between coats to create a smooth, even finish.
For an oil-based finish, apply the oil evenly to all surfaces using a cloth. Allow the oil to penetrate the wood for the recommended time, and then wipe off any excess oil with a clean cloth. Apply multiple coats of oil, allowing each coat to dry completely before applying the next. Oil-based finishes provide a natural-looking finish that enhances the wood's grain and texture.
Once the finishing process is complete, allow the table to dry completely before using it. This will ensure the finish is fully cured and resistant to damage. Inspect the table for any imperfections and touch up as needed. Finally, clean the table with a soft cloth and a mild detergent. The small kitchen table is now complete and ready for use.

25 Diy Dining Tables Bob Vila

25 Diy Dining Tables Bob Vila

How To Build A Dining Table H2obungalow

20 Gorgeous Diy Dining Table Ideas And Plans The House Of Wood

25 Diy Dining Tables Bob Vila

25 Diy Dining Tables Bob Vila

How To Build A Simple Diy Wooden Table Top The Way

Diy Farmhouse Bench Love Grows Wild

20 Gorgeous Diy Dining Table Ideas And Plans The House Of Wood

20 Gorgeous Diy Dining Table Ideas And Plans The House Of Wood
Related Posts

