How To Make A Dining Table
Creating a dining table is a rewarding project that combines functionality and craftsmanship. A well-made dining table can serve as a focal point in a home, providing a space for meals, gatherings, and memories. This article outlines the process of building a robust and aesthetically pleasing dining table, covering material selection, construction techniques, and finishing details.
Planning and Design
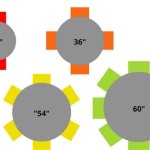
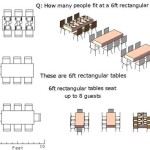
Before commencing the physical construction, meticulous planning is crucial. This stage involves determining the table's dimensions, style, and material. The size of the dining table should be proportional to the dining area and consider the number of people it will typically accommodate. A standard rule of thumb is to allow approximately 24 inches of width per person. Therefore, a table designed for six people should ideally be at least 72 inches long.
Style considerations range from traditional to modern, influencing the design of the legs, apron, and tabletop. Common styles include farmhouse, mid-century modern, and contemporary designs. Farmhouse tables often feature thick, sturdy legs and a rustic finish, while mid-century modern tables tend to have tapered legs and a sleeker profile. Contemporary designs often incorporate minimalist features and unconventional materials.
Material selection is another critical aspect of the planning phase. Hardwoods like oak, maple, walnut, and cherry are popular choices for their durability and aesthetic appeal. Softwoods, such as pine, are more affordable but may be more susceptible to dents and scratches. Consider the grain pattern, color, and cost when making the final decision.
A detailed plan, including precise measurements and joinery details, is highly recommended. This plan can be created using drafting software or by hand. The plan should include views of the tabletop, apron, legs, and any connecting hardware. A cut list outlining the dimensions of each component will also prove invaluable during the construction phase.
Construction Process
The construction process typically involves building the tabletop, creating the apron (the frame that connects the legs to the tabletop), crafting the legs, and assembling the entire structure. Each step requires precision and attention to detail to ensure a stable and visually appealing final product.
Preparing the Tabletop: The tabletop is usually constructed by joining multiple boards together. This can be achieved using various methods, including edge gluing, tongue-and-groove joints, or biscuit joints. Edge gluing is the simplest method, where the edges of the boards are carefully aligned and glued together using wood glue. Clamps are then applied to ensure a tight and even bond. The use of biscuits or tongue-and-groove joints provides added strength and alignment. After the glue has dried, the tabletop should be sanded smooth, starting with a coarse grit sandpaper and progressing to finer grits. The edges can be shaped using a router to create a decorative profile.
Building the Apron: The apron provides structural support to the tabletop and serves as a connection point for the legs. The apron is typically constructed from solid wood and consists of four pieces that are joined together to form a rectangular frame. The corners of the apron can be joined using mortise-and-tenon joints, dowel joints, or pocket hole screws. Mortise-and-tenon joints offer the strongest connection but require more skill and time to execute. Dowel joints are a good compromise between strength and ease of construction. Pocket hole screws are a quick and easy option but may not be as aesthetically pleasing if the screw holes are visible. The apron should be sanded smooth after assembly.
Crafting the Legs: The legs can be made from solid wood or purchased pre-made. If crafting the legs from scratch, it is important to ensure that they are square and of uniform size. The legs can be straight, tapered, or turned, depending on the desired style. Tapered legs can be created using a jig on a table saw or with a hand plane. Turned legs require a lathe. The legs should be sanded smooth and any decorative details, such as carvings or moldings, should be added before assembly.
Assembly: The final stage involves attaching the apron to the tabletop and then attaching the legs to the apron. The apron can be attached to the tabletop using screws, wood glue, or metal fasteners. It is important to ensure that the apron is centered on the tabletop and that the fasteners are properly aligned. The legs can be attached to the apron using screws, bolts, or mortise-and-tenon joints. If using screws or bolts, pre-drilling pilot holes is essential to prevent the wood from splitting. Clamping the legs to the apron during assembly will ensure a tight and secure connection.
Joinery Techniques
The choice of joinery techniques significantly impacts the strength and longevity of the dining table. Different joints offer varying levels of stability and aesthetic appeal. Understanding the principles of each joint type is crucial for selecting the appropriate method for different components of the table.
Mortise and Tenon Joints: Considered one of the strongest woodworking joints, the mortise and tenon involves a mortise (a hole or recess) cut into one piece of wood (the mortise member) and a tenon (a projecting tongue) formed on the end of another piece (the tenon member). The tenon fits snugly into the mortise, creating a mechanical interlock. This joint is particularly suitable for connecting the legs to the apron, providing exceptional resistance to racking forces.
Dovetail Joints: Known for their distinctive interlocking shape, dovetail joints are commonly used for drawer construction but can also be employed in table construction for added visual appeal and strength. The dovetail joint features a series of pins (projections) on one piece that interlock with a series of tails (corresponding recesses) on the mating piece. While visually appealing, creating dovetail joints requires precision and skill.
Biscuit Joints: Biscuit joints utilize small, oval-shaped wooden biscuits that are inserted into matching slots cut into the mating surfaces. The biscuits are glued in place, expanding as they absorb moisture from the glue, creating a tight and strong bond. Biscuit joints are relatively easy to create and are suitable for edge-gluing tabletops and assembling aprons.
Pocket Hole Joints: Pocket hole joints employ angled screws driven into pre-drilled holes at an angle. This method is quick and easy, making it a popular choice for beginners. However, pocket hole joints are not as strong as traditional joinery methods and may require additional reinforcement. They are best suited for non-critical applications, such as attaching the apron to the tabletop.
Sanding and Finishing
Sanding and finishing are essential steps in creating a durable and aesthetically pleasing dining table. Proper sanding ensures a smooth surface free from imperfections, while the finish protects the wood from moisture, stains, and scratches.
Sanding: The sanding process should begin with a coarse grit sandpaper (e.g., 80 grit) to remove any surface imperfections, such as saw marks or glue residue. Progressively finer grits of sandpaper should then be used, moving from 120 grit to 180 grit to 220 grit. Sanding should always be done in the direction of the wood grain to avoid creating scratches. A random orbital sander is recommended for larger surfaces, while a sanding block can be used for edges and corners. After sanding, the surface should be thoroughly cleaned to remove any dust.
Applying the Finish: Various types of finishes can be used to protect and enhance the appearance of the dining table. Common finishes include polyurethane, varnish, lacquer, oil-based finishes, and water-based finishes. Polyurethane is a durable and water-resistant finish that is suitable for high-traffic areas. Varnish provides a similar level of protection but may yellow over time. Lacquer is a fast-drying finish that is often used for furniture. Oil-based finishes, such as tung oil or linseed oil, penetrate the wood and provide a natural look and feel. Water-based finishes are environmentally friendly and offer good protection.
The finish should be applied according to the manufacturer's instructions. Multiple coats of finish are typically required, with light sanding between coats to ensure a smooth surface. A brush, roller, or spray gun can be used to apply the finish. It is important to work in a well-ventilated area and to wear appropriate safety gear, such as a respirator and gloves.
Final Touches: After the final coat of finish has dried, the table can be buffed to create a smooth and lustrous surface. Paste wax can also be applied to provide an additional layer of protection and to enhance the shine. The legs can be fitted with felt pads to protect the floor from scratches. Finally, inspect the table for any imperfections and make any necessary repairs.
By following these steps, one can successfully build a durable and aesthetically pleasing dining table that will serve as a centerpiece in a home for years to come. The key lies in careful planning, precise construction techniques, and meticulous attention to detail during the finishing process.

How To Build A Farmhouse Dining Table Green With Decor

How To Build A Farmhouse Dining Table Green With Decor

20 Gorgeous Diy Dining Table Ideas And Plans The House Of Wood

How To Make A Diy Farmhouse Dining Room Table Restoration Hardware Knockoff Tips For

How To Make A Dining Room Table By Hand The Art Of Manliness

Diy Six Seat Dining Room Table A Beautiful Mess

Diy Dining Table Tutorial Arinsolangeathome

Elsie S Diy Dining Room Table A Beautiful Mess

How To Build A Dining Table 20 Free Plans For Beginners Shanty 2 Chic

Diy Oval Wood Beam Dining Table Grace Oaks Designs
Related Posts