How to Make a Dining Table Out of Scaffold Boards: A DIY Plan
Creating a dining table from reclaimed scaffold boards is a rewarding DIY project. It allows for the creation of a unique and sturdy piece of furniture with a rustic aesthetic. This article outlines the process, providing a detailed, step-by-step guide to construct a durable and aesthetically pleasing dining table using readily available materials and tools.
Materials and Tools Required
The success of this project hinges on having the right materials and tools. This section details the necessary items for constructing the scaffold board dining table.
Scaffold Boards: The primary material is scaffold boards. The number of boards depends on the desired table size. Typically, reclaimed scaffold boards are readily available from builders' merchants or online suppliers. Ensure the boards are straight, relatively free of large splits, and of a consistent thickness. The standard width of a scaffold board is around 225mm, so plan the table dimensions accordingly.
Table Legs: A variety of table leg options exist, each offering a distinct aesthetic. Metal hairpin legs provide an industrial look, while wooden legs offer a more traditional feel. The height of the legs should be chosen to achieve a comfortable dining height, typically around 760mm (30 inches). Sourcing pre-made legs simplifies the build process.
Wood Screws: Wood screws are essential for securely attaching the scaffold boards to each other and the table legs. Select screws of appropriate length, typically 40-50mm, depending on the thickness of the boards and legs. Using screws designed for wood ensures a strong and lasting connection.
Wood Glue: Wood glue provides added strength to the joints between the scaffold boards. Apply a bead of glue to the edges of each board before clamping them together for screwing. This creates a more robust and stable tabletop.
Sandpaper: Sandpaper in varying grits is crucial for preparing the wood surface. Start with a coarse grit (80-120) to remove imperfections and rough edges. Follow with a medium grit (150-180) to smooth the surface, and finish with a fine grit (220-240) for a polished feel. The specific grit progression can be adjusted based on the desired level of smoothness.
Wood Finish: A wood finish protects the table from spills, stains, and general wear and tear. Options include varnish, lacquer, oil, or wax. The choice depends on the desired aesthetic and level of protection. Consider a hard-wearing finish, such as varnish or lacquer, for a dining table that will see frequent use. Oil and wax finishes offer a more natural look but require more frequent maintenance.
Tools:
- Drill/Driver: A drill/driver is necessary for pre-drilling pilot holes and driving screws.
- Sander: An electric sander, such as an orbital sander, significantly speeds up the sanding process. A hand sanding block can be used for finer sanding and hard-to-reach areas.
- Saw: A circular saw or hand saw is required to cut the scaffold boards to the desired length.
- Clamps: Clamps are essential for holding the scaffold boards together while the glue dries. Several clamps will be needed to apply even pressure across the entire tabletop.
- Measuring Tape: A measuring tape is crucial for accurate measurements and ensuring the table is square.
- Square: A square is used to ensure right angles and accurate alignment during the construction process.
- Pencil: A pencil is needed for marking measurements and cutting lines.
- Safety Glasses: Safety glasses protect the eyes from sawdust and debris.
- Dust Mask: A dust mask protects the lungs from inhaling sawdust.
Construction Process: Step-by-Step Guide
This section outlines the procedure for assembling the scaffold board dining table. It’s important to follow these steps carefully to ensure a sturdy and visually appealing end product.
Preparation of Scaffold Boards: Begin by inspecting the scaffold boards for any loose nails or screws. Remove any remaining fasteners using a hammer and pliers. Next, thoroughly clean the boards with a brush and soapy water to remove dirt and grime. Allow the boards to dry completely before proceeding.
Cutting the Boards to Size: Measure and mark the desired length of the tabletop on each scaffold board. Use a circular saw or hand saw to cut the boards to the specified length. Ensure the cuts are straight and accurate. If desired, the ends of the boards can be squared off or left with a more rustic, uneven edge.
Sanding the Boards: Sand the scaffold boards thoroughly, starting with a coarse grit sandpaper (80-120) to remove any rough edges, splinters, and imperfections. Pay particular attention to the edges and corners of the boards. Follow with a medium grit sandpaper (150-180) to smooth the surface further. Finally, use a fine grit sandpaper (220-240) to achieve a smooth and polished finish. Regularly clean the sanding dust with a brush or vacuum.
Joining the Boards: Arrange the scaffold boards side by side on a flat surface, ensuring the best sides are facing up. Apply a bead of wood glue along the edges of each board. Clamp the boards together tightly, ensuring they are aligned flush with each other. Use multiple clamps to apply even pressure across the entire width of the tabletop. Allow the glue to dry completely, typically for 24 hours, according to the manufacturer's instructions.
Securing the Boards with Screws: Once the glue is dry, reinforce the joints between the scaffold boards with wood screws. Pre-drill pilot holes through the boards at regular intervals, typically every 15-20cm. This prevents the wood from splitting when driving the screws. Insert wood screws into the pilot holes, ensuring they are flush with the surface of the wood. Consider using a countersinking drill bit to recess the screw heads slightly for a smoother finish.
Attaching the Table Legs: Position the table legs on the underside of the tabletop, ensuring they are evenly spaced and aligned with the edges. Use a measuring tape and square to ensure accuracy. Mark the position of the leg mounting plates with a pencil. Pre-drill pilot holes through the mounting plate holes into the tabletop. Attach the legs using wood screws, ensuring they are securely fastened. The specific method of attachment will vary depending on the type of table legs used.
Finishing the Tabletop: Once the legs are attached, apply the chosen wood finish to the tabletop. Follow the manufacturer's instructions for application. Several coats may be necessary to achieve the desired level of protection and aesthetic. Lightly sand between coats with a fine grit sandpaper (220-240) to remove any imperfections and ensure a smooth finish. Allow the finish to dry completely before using the table.
Adapting the Plan: Customization Options
The basic plan detailed above can be adapted to suit individual preferences and design requirements. This section explores some customization options to create a truly unique dining table.
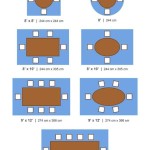
Table Size and Shape: The dimensions of the dining table can be adjusted to fit the available space and seating requirements. Consider the number of people who will typically be using the table when determining the optimal length and width. The shape of the tabletop can also be customized. While a rectangular table is the most common option, a square or round table may be more suitable for certain spaces. The edges of the table can be left square, rounded over, or chamfered for a different aesthetic.
Leg Style and Placement: The choice of table legs significantly impacts the overall look of the dining table. Metal hairpin legs offer an industrial style, while wooden legs provide a more traditional feel. The legs can be placed at the corners of the table or positioned further inward for a different visual effect. Adjustable table legs can be used to accommodate uneven floors. Furthermore, consider the material and finish of the legs to complement the tabletop.
Wood Finish and Treatment: The wood finish can be customized to achieve a specific aesthetic and level of protection. Options include varnish, lacquer, oil, wax, or stain. Varnish and lacquer provide a durable and water-resistant finish, while oil and wax offer a more natural look and feel. Staining the wood can alter its color and enhance the grain. Consider applying a sealant before finishing to prevent moisture absorption. Experiment with different finishes on a scrap piece of scaffold board to determine the desired effect.
Adding Features and Details: Various features and details can be added to enhance the functionality and visual appeal of the dining table. Consider adding a breadboard end to the tabletop for a more refined look and to prevent warping. Inlays or decorative details can be incorporated into the tabletop surface. Add a shelf below the tabletop for storage. Metal banding can be added to the edges of the table for protection and aesthetic appeal. These additions should complement the overall design and enhance the usability of the table.
Distressing the Wood: Many people prefer a more rustic, aged look for their scaffold board tables. This can be achieved by intentionally distressing the wood. This can involve using a hammer and chain to create dents and scratches, or using a wire brush to remove softer wood fibers and expose the grain. Be cautious when distressing to avoid weakening the boards excessively.
This DIY plan provides a framework for constructing a scaffold board dining table. By carefully following the steps and adapting the plan to individual preferences, a unique and durable piece of furniture can be created.

How To Make An Industrial Rustic Scaffold Board Dining Table And Bench

Diy Scaffold Board Dining Table And Bench

Makeover A Dining Table Made From Scaffold Boards Roses And Rolltops

How To Make An Industrial Rustic Scaffold Board Dining Table And Bench
.jpg.aspx?strip=all "How To Make A Table Out Of Scaffold Boards Upcycling Safe")
How To Make A Table Out Of Scaffold Boards Upcycling Safe
.jpg.aspx?strip=all "How To Make A Table Out Of Scaffold Boards Upcycling Safe")
How To Make A Table Out Of Scaffold Boards Upcycling Safe

Diy Scaffold Board Dining Table And Bench

How To Make An Industrial Rustic Scaffold Board Dining Table And Bench

Makeover A Dining Table Made From Scaffold Boards Roses And Rolltops

How To Build A Scaffold Board Table Prevent Cupping
Related Posts