How to Make a Patchwork Tablecloth
Creating a patchwork tablecloth is a rewarding project allowing for the utilization of fabric scraps, the expression of personal style, and the creation of a unique and functional item for the home. The process, while requiring patience and attention to detail, is accessible to individuals with basic sewing skills. This article outlines the steps involved in designing, cutting, assembling, and finishing a patchwork tablecloth.
Planning and Preparation
The initial stage of creating a patchwork tablecloth involves careful planning. This encompasses determining the desired size of the finished tablecloth, selecting fabrics, and deciding on a pattern or design. These preparatory steps are crucial for ensuring a successful outcome.
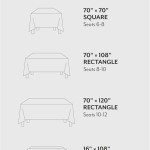
Determining the Tablecloth Size: The size of the tablecloth will depend on the dimensions of the table it is intended to cover and the desired amount of overhang. Measure the length and width of the table. Add the desired overhang length twice to both the length and the width. For example, if the table is 48 inches wide and 72 inches long, and a 12-inch overhang is desired on each side, the tablecloth should be 72 inches wide and 96 inches long. It's always preferable to err on the side of slightly larger rather than too small, as adjustments can be made during the finishing stages.
Fabric Selection: Fabric selection is a key aspect of the design process. Consider the overall aesthetic, the durability required, and the washability of the chosen materials. Cotton fabrics are a popular choice for tablecloths due to their ease of care and availability in a wide range of colors and patterns. However, other fabrics such as linen, blends, or even repurposed clothing can be incorporated. Ensure that all fabrics are compatible in terms of weight and washability to prevent uneven shrinkage or distortion after laundering. Pre-washing the fabric before cutting is highly recommended to avoid future shrinkage.
Design and Pattern: The design of the patchwork can range from simple squares or rectangles to more complex geometric patterns. Consider the skill level and the desired aesthetic. Common patterns include:
- Simple Squares: This is the easiest and most straightforward pattern, suitable for beginners.
- Rectangles: Similar to squares, but allows for more variation in design.
- Triangles: More complex than squares or rectangles, but allows for the creation of visually interesting designs.
- Strip Piecing: Involves sewing long strips of fabric together and then cutting them into segments to create repeating patterns.
- Log Cabin: A classic quilt block pattern that involves adding strips of fabric around a central square.
Calculating Fabric Requirements: Once the design is finalized, calculate the amount of each fabric needed. This requires determining the size of each individual patch and multiplying it by the number of patches required for each fabric. Add extra fabric for seam allowances (typically ¼ inch) and for potential errors. It is always better to have more fabric than needed. A spreadsheet or a simple table can be helpful in organizing these calculations.
Assembling the Patchwork
The assembly process involves cutting the fabric pieces, arranging them according to the design, and sewing them together to create the patchwork top.
Cutting the Fabric: Use a rotary cutter, cutting mat, and ruler to accurately cut the fabric pieces according to the planned dimensions. Precision is crucial for ensuring that the finished patchwork lies flat and the seams align correctly. For repetitive shapes, consider using templates to ensure consistency. Always double-check measurements before cutting to avoid costly mistakes.
Arranging the Patches: Before sewing, lay out all the cut fabric pieces on a large flat surface according to the planned design. This allows for a final visual check of the color placement and pattern arrangement. Make any necessary adjustments at this stage. Consider taking a photograph of the layout to use as a reference during the sewing process. Labeling rows or columns can be helpful to maintain the correct order.
Sewing the Patches Together: Start by sewing the patches together in rows or columns. Use a consistent seam allowance (typically ¼ inch) and press the seams open or to one side after each row is completed. Pressing seams open reduces bulk, while pressing them to one side can provide stability. The choice depends on the fabric type and the desired aesthetic. After each row or column is sewn, carefully align and pin the rows or columns together before sewing them to each other. Pay close attention to matching the seams where rows or columns intersect. Use a walking foot on the sewing machine if dealing with bulky or slippery fabrics to ensure even feeding.
Managing Seams: The method of pressing seams significantly affects the overall look and feel of the finished tablecloth. Pressing seams open distributes bulk evenly and is generally recommended for intricate patchwork designs. However, pressing seams to one side can provide added stability and is preferred for fabrics that fray easily. If pressing to one side, alternate the direction of the seam allowances in adjacent rows to prevent the fabric from pulling or puckering. Clip corners and curves carefully before turning the patchwork right side out to reduce bulk and allow the seams to lie flat.
Finishing the Tablecloth
The final stage involves adding a backing fabric, quilting (optional), and binding the edges to create a finished, durable tablecloth.
Adding the Backing Fabric: Cut a piece of backing fabric that is slightly larger than the patchwork top. This allows for adjustments during the quilting process. Muslin or a coordinating cotton fabric are common choices for backing. Lay the backing fabric right side down on a flat surface, then place a layer of batting (if desired) on top of the backing fabric. Lay the patchwork top right side up on top of the batting. Basting the layers together using safety pins or thread is recommended to prevent shifting during quilting.
Quilting (Optional): Quilting involves stitching through all three layers (patchwork top, batting, and backing) to secure them together and add texture. This step is optional, but it adds durability and visual interest to the tablecloth. Quilting can be done by hand or by machine. Simple straight-line quilting, following the seams of the patchwork, is a common choice for beginners. More elaborate quilting designs can be used for a more decorative effect.
Binding the Edges: Binding the edges provides a finished look and protects the edges of the tablecloth from fraying. Cut strips of fabric (typically 2-3 inches wide) and sew them together end-to-end to create a long strip. Fold the strip in half lengthwise and press. Align the raw edges of the binding strip with the raw edge of the tablecloth and sew them together using a ¼ inch seam allowance. Miter the corners for a neat finish. Fold the binding over to the back of the tablecloth and hand-stitch or machine-stitch it in place, encasing the raw edges. Ensure the binding is securely attached and lies flat. Alternatively, a pre-made bias tape can be used to bind the edges, following the manufacturer's instructions.
Final Pressing and Inspection: Once the binding is complete, give the tablecloth a final pressing to remove any wrinkles and ensure that the seams lie flat. Inspect the tablecloth for any loose threads or imperfections and trim them as needed. Thoroughly inspect the finished tablecloth for any areas that require additional reinforcement or repair. Correcting any flaws at this stage will prolong the lifespan of the tablecloth.
By following these steps, individuals can create a unique and personalized patchwork tablecloth that will add beauty and functionality to their home. The process encourages creativity, resourcefulness, and the development of valuable sewing skills.

Jazz Up A Plain Tablecloth With Colorful No Sew Patchwork Detail

How To Make A Simple Patchwork Quilt Tablecloth

How To Make A Patchwork Tablecloth Craft Ideal Home

How To Make A Quick And Easy Tablecloth Sew My Place

How To Get Started With Patchwork Table Cloth

A Quilted Tablecloth That Can Be Made Quickly And Easily

Charm Pack Table Runner Topper A Quilting Life

Printable One Hour Table Runner Tutorial Pattern Super Mom No Cape

Quilted Table Cloth For A Cozy Home Decor

No Sew Bandana Recycled Jean Table Cloth 10 Steps With Pictures Instructables
Related Posts

