How to Make Placemats for a Round Table
Placemats are a practical and decorative element for any dining table. They protect the table surface from heat, spills, and scratches, while also enhancing the overall aesthetic. Creating placemats specifically designed for a round table requires a slightly different approach than making rectangular or square ones. This article provides a comprehensive guide on how to make placemats for a round table, covering various materials, measurement techniques, and construction options.
1. Selecting Materials and Determining Dimensions
The first step in making round placemats involves selecting the appropriate materials. The choice of material impacts the placemat's durability, appearance, and washability. Several options are available, each with its own advantages and disadvantages.
Fabric:
Fabric is a versatile option that offers a wide range of colors, patterns, and textures. Cotton, linen, and blends are popular choices for their washability and affordability. Heavier fabrics like canvas or denim offer greater protection and durability. Consider pre-washing the fabric to prevent shrinkage after the placemats are completed. Choose a fabric that complements the existing dining room decor.Cork:
Cork is a natural and heat-resistant material. It provides excellent protection for the table surface and adds a rustic touch to the dining area. Cork placemats are relatively easy to clean and maintain. Cork can be purchased in sheets or rolls, making it suitable for cutting into round shapes.Vinyl:
Vinyl is a durable and waterproof option, making it ideal for households with children or frequent spills. Vinyl placemats are easy to wipe clean and come in a variety of colors and patterns. However, vinyl may not be as heat-resistant as other materials, so caution should be exercised when placing hot dishes on them. It’s often used as a coating over fabric for easy wipeability.Felt:
Felt is a soft and absorbent material that can add a cozy feel to the dining table. Felt is relatively inexpensive and easy to work with. However, felt placemats may not be as durable or stain-resistant as other options. Consider using thicker felt or layering multiple sheets for added protection.Woven Materials:
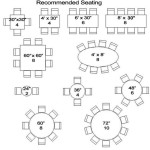
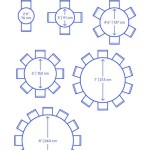
Woven materials like bamboo, rattan, or seagrass offer a natural and textured look. These materials are relatively heat-resistant and easy to clean. Woven placemats can add a bohemian or coastal vibe to the dining room. Ensure the weave is tight enough to prevent spills from seeping through.Once the material is selected, the next step is to determine the appropriate dimensions. The size of the placemats should be proportional to the size of the round table and the dinnerware being used. A general guideline is to allow at least 12 inches of space for each diner. For a standard round table that seats four, placemats with a diameter of 14 to 16 inches are usually adequate. For larger tables, consider increasing the diameter accordingly.
To determine the precise diameter, measure the diameter of the plates and bowls that will be used on the placemats. Add a few inches to each side to allow for adequate space around the dinnerware. A larger placemat provides better protection for the table and creates a more visually appealing presentation.
2. Cutting and Shaping the Round Placemats
After selecting the materials and determining the dimensions, the next step involves cutting and shaping the round placemats. Accuracy in this stage is crucial to ensure that the placemats are uniform and visually appealing.
Using a Template:
A template simplifies the process of cutting consistent round shapes. Create a template by drawing a circle of the desired diameter on a piece of cardboard or sturdy paper. A compass or a plate of the desired size can be used as a guide. Once the circle is drawn, carefully cut it out to create the template.Cutting Fabric:
When working with fabric, place the template on top of the fabric and secure it with pins. Use a rotary cutter or fabric scissors to carefully cut around the template. For multiple placemats, layer the fabric to cut several pieces at once, ensuring the layers are securely pinned to prevent shifting.Cutting Cork, Vinyl, or Felt:
For materials like cork, vinyl, or felt, the same template method can be used. Place the template on the material and trace around it with a marker or pen. Use a utility knife, scissors, or a rotary cutter to carefully cut along the traced line. Exercise caution when using sharp tools, especially a utility knife.Ensuring Uniformity:
To ensure that all placemats are the same size and shape, cut one placemat first and use it as a template for the remaining ones. This ensures consistency and reduces the risk of errors. Double-check the measurements and shapes before proceeding to the next step.Addressing Imperfections:
Minor imperfections in the shape can be corrected using scissors or a rotary cutter. If the edges are slightly uneven, trim them carefully to create a smooth and uniform circle. A rotary cutter with a sharp blade can provide a clean and precise cut.3. Finishing Techniques and Decorative Options
Once the round shapes are cut, the final step involves finishing the edges and adding any desired decorative elements. The finishing technique depends on the material used and the desired aesthetic.
Sewing the Edges (Fabric):
For fabric placemats, sewing the edges prevents fraying and provides a clean, finished look. A serger machine can be used to overlock the edges, creating a professional and durable finish. Alternatively, a zigzag stitch on a sewing machine can also be used to prevent fraying. A straight stitch can then be used to create a neat hem.Binding the Edges (Fabric):
Binding tape can be used to create a decorative and durable edge. Choose a binding tape that complements the fabric in color and texture. Attach the binding tape using a sewing machine or by hand-stitching. Ensure that the binding tape is securely attached to prevent it from coming loose.Sealing the Edges (Cork, Vinyl, or Felt):
For materials like cork, vinyl, or felt, sealing the edges can prevent fraying or cracking. A sealant specifically designed for the material being used can be applied to the edges. Alternatively, a heat gun can be used to slightly melt and seal the edges of vinyl or felt. Exercise caution when using a heat gun to avoid damaging the material.Adding Decorative Elements:
Decorative elements can be added to enhance the appearance of the placemats. These can include:Embroidery:
Embroidered designs can add a personal touch to the placemats. Simple patterns or monograms can be embroidered by hand or using an embroidery machine.Appliqués:
Appliqués are fabric shapes that are sewn onto the placemats to create a decorative effect. Appliqués can be purchased pre-made or cut from fabric scraps.Paint or Stencils:
Paint or stencils can be used to add designs or patterns to the placemats. Fabric paint is ideal for fabric placemats, while acrylic paint can be used for cork, vinyl, or felt placemats. Stencils can be used to create precise and repeatable designs.Ribbons or Lace:
Ribbons or lace can be attached to the edges of the placemats to add a delicate and decorative touch. Attach the ribbons or lace using glue or by sewing them onto the placemats.Personalized Touches:
Monograms, names, or dates can be added to the placemats to create a personalized touch. These can be embroidered, painted, or stenciled onto the placemats. This adds a unique element, particularly suitable for special occasions or as a thoughtful gift.By carefully selecting materials, accurately cutting the shapes, and applying appropriate finishing techniques, creating custom placemats for a round table becomes a manageable and rewarding project. The finished placemats will not only protect the table but also enhance the dining experience with a personalized touch.

Easy Diy Round Table Placemats

Learn To Create Placemats For A Round Table Using Serger

Diy Round Table Placemats Sewing With Scraps

Diy Placemats

Perfect Placemats For Your Round Table

Easy Placemats For A Round Table Free Pattern

2 Diy Placemats For Your Round Tulip Table

How To Sew Placemat Perfect For Round Table Patchwork Placemats Diy Reversible Tutorial

Merry Go Round Placemats For The Quaintest Table Setting Quilting Cubby

How To Make Tropical Round Placemats With Raffia And Burlap
Related Posts

