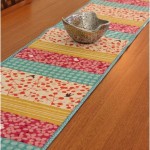
How To Make Table Runners and Placemats
Table runners and placemats add a touch of elegance and personality to any dining setting. Creating these decorative elements can be a rewarding project, allowing for customization of color, fabric, and size to perfectly complement existing décor. This article provides detailed instructions on crafting both table runners and placemats.
Materials Needed for Table Runners and Placemats:
The materials required for both projects share some common elements, although specific quantities will vary based on the desired dimensions.
Fabric: The choice of fabric significantly impacts the final look and feel. Consider the occasion and overall aesthetic when selecting materials. Linen, cotton, burlap, and polyester are popular options. For a more durable and stain-resistant option, consider outdoor or upholstery fabrics.
Lining Fabric (optional): Lining adds structure and prevents the table runner or placemat from being see-through. Choose a complementary lining fabric that is slightly lighter in weight than the main fabric.
Measuring Tape: Accurate measurements are crucial for professional-looking results.
Scissors: Sharp fabric scissors will ensure clean cuts and prevent fraying.
Pins: Pins help secure the fabric layers before sewing.
Sewing Machine (recommended): While hand-sewing is possible, a sewing machine significantly speeds up the process and creates more even stitches.
Iron and Ironing Board: Pressing is essential for achieving crisp seams and a polished finish.
Thread: Choose a thread color that matches or complements the fabric.
Creating a Table Runner:
Measure and Cut: Determine the desired length and width of the table runner. Add two inches to both the length and width for seam allowance. Cut the main fabric and lining fabric (if using) to these dimensions.
Prepare the Fabric: If using lining, place the main fabric and lining fabric with right sides facing each other. Pin the layers together along the edges.
Sew the Long Edges: Using a sewing machine, stitch along both long edges with a half-inch seam allowance. Leave a four-inch opening along one of the long edges for turning.
Turn and Press: Carefully turn the table runner right side out through the opening. Use a pointed object, such as a chopstick, to push out the corners. Press the seams flat, tucking in the raw edges of the opening.
Topstitch: Topstitch around the entire perimeter of the table runner, closing the opening and adding a professional finish. This step also helps to secure the lining in place.
Creating Placemats:
Measure and Cut: Determine the desired dimensions for the placemats. Standard sizes are typically around 12x18 inches or 14x20 inches. Add one inch to both the length and width for seam allowance. Cut the main fabric and lining fabric (if using) to these dimensions.
Prepare the Fabric: Place the main fabric and lining fabric with right sides facing each other. Pin the layers together along the edges.
Sew the Edges: Stitch around the entire perimeter of the placemat with a half-inch seam allowance, leaving a three-inch opening along one edge for turning.
Clip the Corners: Carefully clip the corners diagonally, being careful not to cut through the stitching. This will help the corners lie flat when turned right side out.
Turn and Press: Turn the placemat right side out through the opening. Use a pointed object to push out the corners. Press the seams flat, tucking in the raw edges of the opening.
Topstitch: Topstitch around the entire perimeter of the placemat, closing the opening and providing a neat finish. The topstitching will also help to secure the lining.
Adding Decorative Elements:
Once the basic table runner and placemats are complete, consider adding decorative elements for a personalized touch. These can include:
Mitered Corners: Mitered corners create a more polished and professional look for both table runners and placemats.
Embroidery or Appliqué: Add personalized designs or monograms to enhance the aesthetic appeal.
Tassels or Fringe: Attaching tassels or fringe to the ends of the table runner can create a more dramatic look.
Fabric Paint or Stencils: Use fabric paint and stencils to add patterns or designs.
Ribbon or Trim: Sew ribbon or trim along the edges of the table runner or placemats for added detail.
By following these steps and incorporating personal design choices, individuals can create unique and stylish table runners and placemats to complement any dining experience.

How To Make A Table Runner 3 Easy Diy Runners Treasurie

How To Make A Reversible Table Runner For Beginners

How To Make A Table Runner From Placemats

How To Make A Table Runner

Beginner Sewing Project Diy Placemats Table Runner Reversible

Woven Table Runner Craft Project Better Homes And Gardens

Beginner Sewing Project Diy Placemats Table Runner Reversible

5 Ways To Decorate A Table With Runner Pottery Barn

Diy Reversible Table Runner Placemats

Diy Placemats
Related Posts