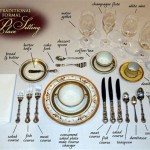
How to Sew a Small Tablecloth
A small tablecloth can elevate the ambiance of a coffee table, end table, or even a small dining table. Sewing your own allows for personalized design and fabric choices, bringing a touch of your unique style to your home. Whether you are a seasoned seamstress or just starting your sewing journey, creating a small tablecloth is a manageable and rewarding project. This guide will walk you through the process, step by step.
1. Gathering Your Supplies
Before starting your project, ensure that you have all the necessary supplies. This will streamline your sewing process and prevent unnecessary interruptions.
- Fabric: Choose a fabric that suits your intended use and aesthetic preference. Cotton, linen, and polyester are popular choices for tablecloths due to their durability and ease of care. For a more formal look, consider damask or brocade.
- Measuring tape: A measuring tape is essential for accurately determining the size of your tablecloth.
- Scissors: Sharp scissors are needed for precise cutting of the fabric.
- Thread: Choose a thread color that complements and blends well with your chosen fabric.
- Sewing machine: A sewing machine will make the process considerably faster and easier than hand-stitching.
- Iron and ironing board: Pressing your fabric before and after sewing will ensure a crisp and professional finish.
- Safety pins: Safety pins will help you secure the fabric before sewing and prevent it from shifting.
- Seam ripper: A seam ripper is helpful for correcting any sewing mistakes.
- Pins: Pins will hold the fabric securely in place while you sew.
2. Measuring and Cutting Your Fabric
Precise measurements are crucial for a beautifully finished tablecloth. Before cutting your fabric, decide on the desired size and shape of your tablecloth. For a standard rectangular tablecloth, measure the length and width of your table, adding extra inches for overhang on all sides.
For example, if your table measures 24 inches by 36 inches, you could add an extra 6 inches on each side, resulting in a final tablecloth size of 36 inches by 48 inches. Consider adding more overhang for a more dramatic effect.
Once you have determined the final size, carefully lay out your fabric on a flat surface, ensuring it is smooth and free of wrinkles. Using your measuring tape, mark the desired dimensions on the fabric. Use chalk or a fabric pencil for clear markings. Carefully cut along the marked lines, ensuring that the cut is clean and straight.
3. Preparing the Fabric Edges
To prevent fraying and ensure a neat finish, it is essential to prepare the edges of your tablecloth before sewing. There are multiple methods for finishing edges, each with its own aesthetic and functional properties.
- Hemming: A traditional hem involves folding the fabric edge under twice and sewing along the fold. This creates a neat and durable finish that is suitable for most tablecloths.
- Serging: Serging uses a special sewing machine to create a decorative and functional edge that prevents fraying. This technique is particularly useful for fabrics that tend to unravel easily.
- Binding: Binding involves stitching a decorative fabric strip around the edge of the tablecloth. This technique adds a touch of elegance and can be used to create a contrasting color accent.
Choose the edge preparation method that best suits your fabric and desired aesthetic.
4. Sewing the Tablecloth
Now that your fabric edges are prepared, you can begin sewing the tablecloth. If you are using a sewing machine, choose a stitch that is suitable for the fabric thickness and desired finish. A straight stitch is a common and reliable choice for tablecloths.
Begin by pinning the fabric edges together, ensuring that the right sides of the fabric face each other. Use safety pins to prevent the fabric from shifting while you sew. Slowly sew along the pinned edges, maintaining a consistent speed for a smooth finish. Remember to backstitch at the beginning and end of each seam to reinforce the stitching and prevent unraveling.
If you are hand-stitching, use a backstitch or a slip stitch for a secure and invisible seam. Take your time and ensure that each stitch is even and consistent.
5. Finishing Touches
Once you have sewn all the seams, it is time to add finishing touches to your tablecloth. Remove any pins and carefully press all seams with a hot iron. This will flatten the stitching and create a crisp and professional finish.
If you opted for a serged edge, you can skip the pressing step. However, if you used a hem or binding, ensure that the folded edges are pressed neatly before pressing the seams.
Finally, inspect your tablecloth for any loose threads or imperfections and trim them accordingly. Your handmade tablecloth is now ready to adorn your table and enhance your home décor. You can further personalize it by adding decorative embellishments like embroidery, applique, or lace.

How To Make A Quick And Easy Tablecloth Sew My Place

How To Make A Tablecloth Any Size Shape Pattern Calculator Treasurie

How To Make A Tablecloth

Toddlers Damaging Your Furniture A Quick Diy Cornered Tablecloth You Can Sew In Just One Hour

How To Sew A Ruffle Tablecloth Kim Byers

Sewing Tutorial Ruffled Tablecloth Our Thrifty Ideas

How To Make A Tablecloth Fit Any Table Shape Or Size O Sewing

How To Make A Tablecloth With Pictures Wikihow

Sewing A Pretty Chintz Tablecloth With Bullion Fringe Pender Peony Southern Blog

How To Make A Tablecloth With Pictures Wikihow
Related Posts